Connecting from PowerBI#
In this article, we will show you how to connect PowerBI to Querona.
Note
Querona emulates Microsoft SQL Server, therefore a built-in SQL Server provider is sufficient to connect to Querona.
PowerBI documentation is available in Microsoft online help.
Step 1: Open PowerBI and select Microsoft SQL Server#
If you have not started the PowerBI yet, open it. Under the “Get Data” section, please select the SQL Server option.
A new dialog opens.
Step 2: Enter server name taken from Querona Dashboard#
Into a “Server” textbox enter the Querona server name and select a “DirectQuery” option. You can leave the “Database” textbox empty.
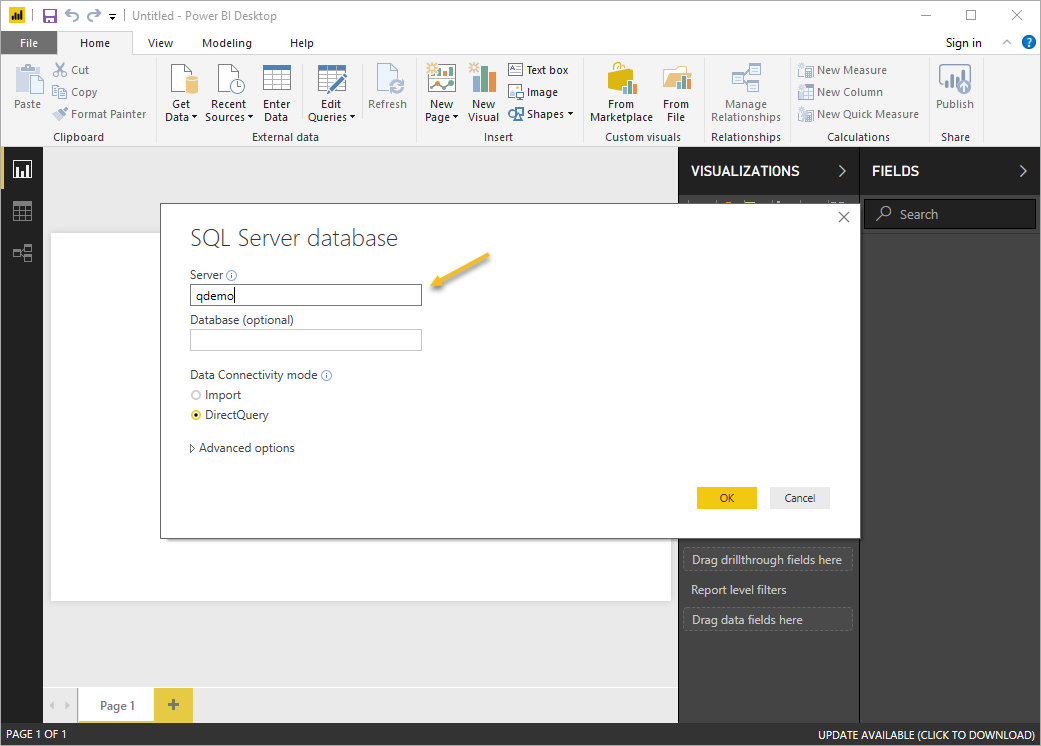
Click OK.
Step 3: Choose a database and desired tables or views#
From the left menu in PowerBI choose desired tables or views and start exploring your data with PowerBI.
Click Load.
Step 4: Choose query mode#
Notice that thanks to Querona the “DirectQuery” mode is always available, so only results of your queries are transferred.
That concludes the steps required to connect and use PowerBI with Querona.